Salam and hi guys,
Within few more days, 2012 is coming to the end. As for me in photography, this year is considered as the best for me. Much that I earned, be it from achievements, knowledge, and also experiences.
In this thread, I would like to share with you guys, the very best twelve pictures that I captured throughout this year.
#1

Taiping Bus Station.
Nikon D700 | Samyang 14mm f/2.8 | ISO100 | f/8 | 1/15sec
Using ultra wide angle lens like this Samyang meaning that in order to fill in the frame, you have to get closer. That's what I did, for the first time. Luckily they did not bragging much when I pointed my big camera directly on their faces :P
#2

Morning at the foothill of Bukit Larut.
Nikon D700 | Tamron SP AF 90mm f/2.8 | ISO640 | 1/150sec | f/8 |
I was waiting for a 4WD to pick me up to the summit when this rays of light came out. I did few simple post editing to this image, like to use much warmer color.
#3

Sunrise at Masjid Putra.
Nikon D700 | Samyang 14mm f/2.8 | ISO100 | f/8 | 5 exposures bracketing |
One of the rare opportunity I got to shoot sunrise from this angle. Talking about HDR, I have been searching for years since the first time I'm doing landscape photography, the right settings to make it looks natural. Now since I got few filters, I seldom used HDR except when it is needed.
#4

It's Lunch Time.
Nikon D700 | Samyang 14mm f/2.8 | ISO1000 | f/8 | 1/125sec |
The iconic restaurant of Ipoh ; Yong Suan Coffee Shop or widely known as "Nasi Ganja". I did shoot few frames of the same scene, but this one particularly got my attention as the stall worker on the left side of the picture look on my camera.
#5
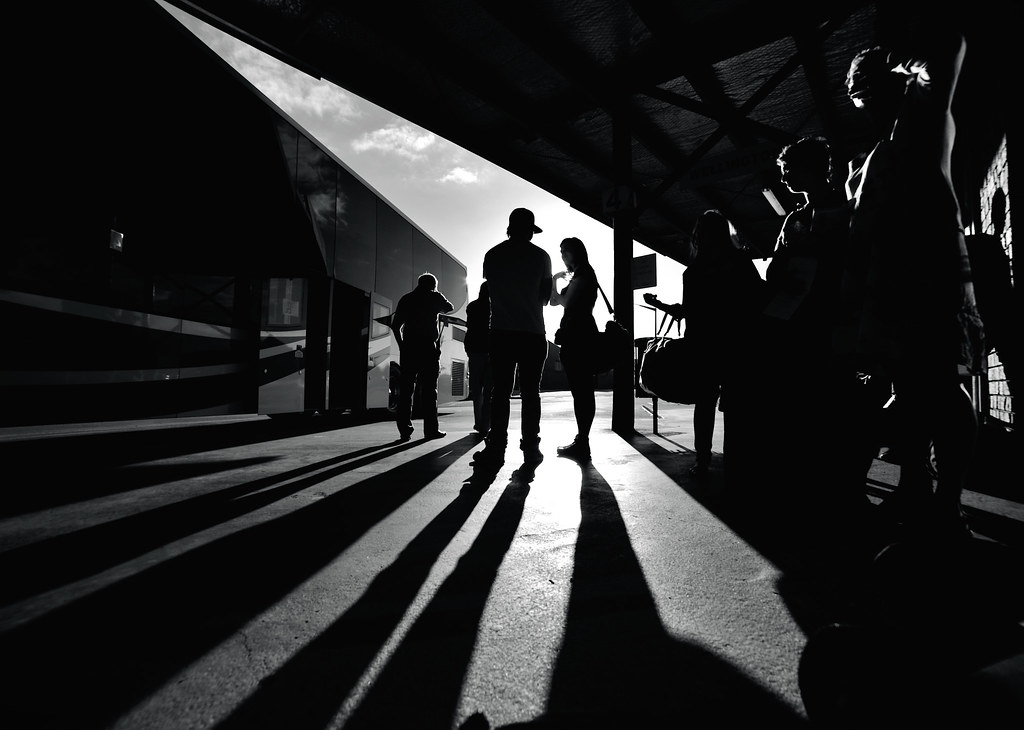
Waiting to Board.
Nikon D700 | Samyang 14mm f/2.8 | ISO100 | 1/640sec | f/8 |
This picture was taken while I was waiting for bus to go to Wellington from my hometown, Palmerston North. I intended to shoot silhouette of the people lining up to get on the bus, plus the shadow was so attracting.
#6

Motukikie Rocks, West Coast New Zealand.
Nikon D700 | Nikkor 16-35mm f/4G ED VR | ISO100 | 22mm | f/8 | 6 sec |
Dubbed as "Top 10 Scenic Drive In The World". One of the craziest things I have done this year was to get down here, alone. This place is only accessible during low tide. Waves can be calm at one time, and suddenly can change into 6 meter high waves crushing the beach. Many lives lost along the shore of this coast. I got soaked myself up to my waist but luckily made it out safely after dusk. This picture was shot using Hitech ND1.2 and Reverse ND Grad0.6 filters.
#7

Coal Creek Falls
Nikon D700 | Nikkor 16-35mm f/4G ED VR | 16mm | f/8 | 5 sec | ISO100.
Coal Creek Falls is one of the famous waterfalls in West Coast Region. I walked for 3 km from my cabin at Rapahoe before another 1km bush walk to come here. Image was shot using CPL filter stacked with Hitech ND1.2.
#8

Secluded Pier at Lake Brunner.
Nikon D700 | Nikkor 16-35mm f/4G ED VR | 22mm | ISO100 | f/14 | 1/15sec |
Secluded Pier at Lake Brunner: I was on my 170km solo cycling trip around West Coast, New Zealand and one of the destinations was this famous Lake Brunner. I reached this pier in one foggy morning and I found this moment was like no other. If I have to choose the very best picture for this year, then it will be this one. It is also my only submission for National Geographic Photo Contest 2012 and was chosen as Editor's Choice for that contest. It was also featured and published some famous press websites such as Huffington Post, Daily Mail UK, Atlantic.com and my biggest dream come true, Big Picture Boston.com
#9

Whangarei Falls, New Zealand.
Nikon D700 | Nikkor 16-35mm f/4G ED VR | 29mm | f/8 | ISO100 | 5 exposures bracketing |
Was taken during my recent summer trip to Northland region, New Zealand. Situated about 5km from the Whangarei Central, this waterfalls is one of the main attractions in the Northland region, New Zealand.
#10

Sunset at Russell, Bay of Islands New Zealand.
Nikon D700 | Nikkor 16-35mm f/4G ED VR | 16mm | f/14 | 0.5sec | ISO100|
View of the sunset from the main wharf. I went here by ferry from Paihia which is just across the bay. This picture was shot using Hitech ND1.2 and Reverse ND0.9 Grad. Initially, this picture was pretty underexposed but since I shoot in RAW, most of the details were successfully recovered using Adobe Camera RAW.
#11

Head of Lake Wakatipu at dusk.
Nikon D700 | Nikkor 16-35mm f/4G ED VR | 16mm | f/18 | 2.5 sec | ISO100 |
This was taken from wharf at Glenorchy, a small township 50km from Queenstown, New Zealand. Can be seen in this picture, the mountainous region of Mount Aspiring National Park. To the right of this picture lies the Earnslaw Mountain. Those who watch the beginning of LOTR; Two Towers should remember this mountain. Filming of the latest "The Hobbit" was also done within these areas. I used Hitech ND1.2 and GND0.6 filters for this shot.
#12
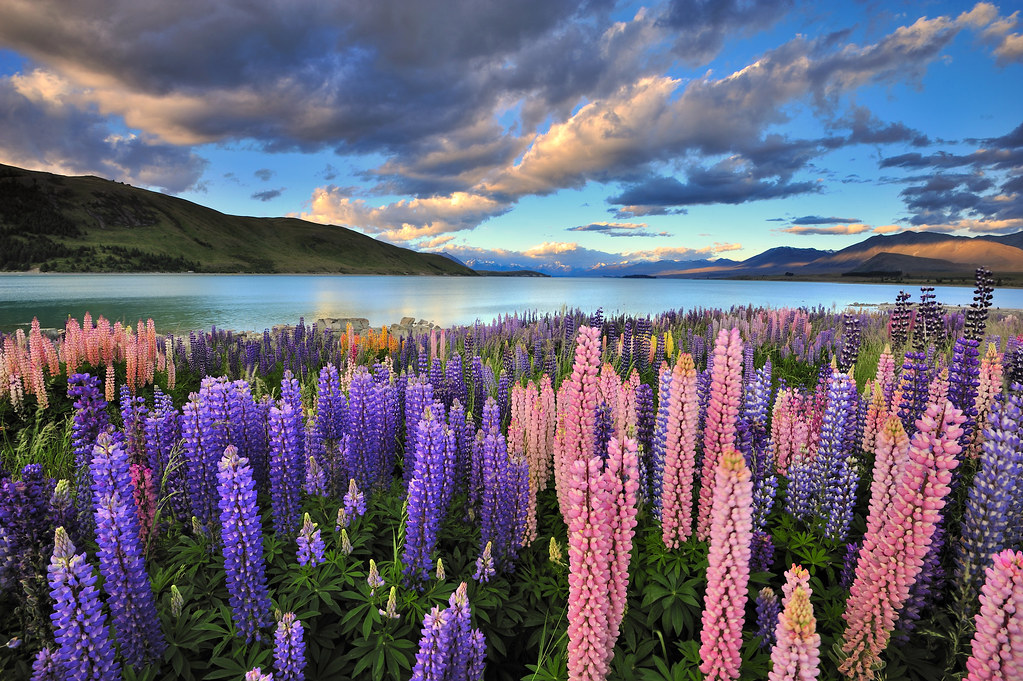
Lupines on the shore of Lake Tekapo, New Zealand.
Nikon D700 | Nikkor 16-35mm f/4G ED VR | 16mm | f/14 | 1/8 sec | ISO100 |
Lake Tekapo is one of the famous tourist attractions in South Island, which means that there are so many pictures taken from the same, already known angles. My mindset when go to the places to shoot is to find an angle or spot where it "does not looks the same like others". I found this spot which is not far from my hostel during afternoon stroll, and came back later on during evening to shoot. This picture was shot with Hitech GND0.6. Post processing was done only with Nikon Capture NX2.
That's all for now. My hope for next year is that I am able to produce much better pictures at better places.
Thanks guys for your time to visit this entry :)